
This post is about containers, a construct similar to virtual machines (VM) but so much lightweight that you can easily create a dozen on your desktop Ubuntu!
A VM virtualizes a whole computer and then you install in there the guest operating system. In contrast, a container reuses the host Linux kernel and simply contains just the root filesystem (aka runtimes) of our choice. The Linux kernel has several features that rigidly separate the running Linux container from our host computer (i.e. our desktop Ubuntu).
By themselves, Linux containers would need some manual work to manage them directly. Fortunately, there is LXD (pronounced Lex-deeh), a service that manages Linux containers for us.
We will see how to
- setup our Ubuntu desktop for containers,
- create a container,
- install a Web server,
- test it a bit, and
- clear everything up.
Set up your Ubuntu for containers
If you have Ubuntu 16.04, then you are ready to go. Just install a couple of extra packages that we see below. If you have Ubuntu 14.04.x or Ubuntu 15.10, see LXD 2.0: Installing and configuring LXD [2/12] for some extra steps, then come back.
Make sure the package list is up-to-date:
sudo apt update
sudo apt upgrade
Install the lxd package:
sudo apt install lxd
If you have Ubuntu 16.04, you can enable the feature to store your container files in a ZFS filesystem. The Linux kernel in Ubuntu 16.04 includes the necessary kernel modules for ZFS. For LXD to use ZFS for storage, we just need to install a package with ZFS utilities. Without ZFS, the containers would be stored as separate files on the host filesystem. With ZFS, we have features like copy-on-write which makes the tasks much faster.
Install the zfsutils-linux package (if you have Ubuntu 16.04.x):
sudo apt install zfsutils-linux
Once you installed the LXD package on the desktop Ubuntu, the package installation scripts should have added you to the lxd group. If your desktop account is a member of that group, then your account can manage containers with LXD and can avoid adding sudo in front of all commands. The way Linux works, you would need to log out from the desktop session and then log in again to activate the lxd group membership. (If you are an advanced user, you can avoid the re-login by newgrp lxd in your current shell).
Before use, LXD should be initialized with our storage choice and networking choice.
Initialize lxd for storage and networking by running the following command:
$ sudo lxd init
Name of the storage backend to use (dir or zfs): zfs
Create a new ZFS pool (yes/no)? yes
Name of the new ZFS pool: lxd-pool
Would you like to use an existing block device (yes/no)? no
Size in GB of the new loop device (1GB minimum): 30
Would you like LXD to be available over the network (yes/no)? no
Do you want to configure the LXD bridge (yes/no)? yes
> You will be asked about the network bridge configuration. Accept all defaults and continue.
Warning: Stopping lxd.service, but it can still be activated by:
 lxd.socket
 LXD has been successfully configured.
$ _
We created the ZFS pool as a filesystem inside a (single) file, not a block device (i.e. in a partition), thus no need for extra partitioning. In the example I specified 30GB, and this space will come from the root (/) filesystem. If you want to look at this file, it is at /var/lib/lxd/zfs.img.
That’s it! The initial configuration has been completed. For troubleshooting or background information, see https://www.stgraber.org/2016/03/15/lxd-2-0-installing-and-configuring-lxd-212/
Create your first container
All management commands with LXD are available through the lxc command. We run lxc with some parameters and that’s how we manage containers.
lxc list
to get a list of installed containers. Obviously, the list will be empty but it verifies that all are fine.
lxc image list
shows the list of (cached) images that we can use to launch a container. Obviously, the list will be empty but it verifies that all are fine.
lxc image list ubuntu:
shows the list of available remote images that we can use to download and launch as containers. This specific list shows Ubuntu images.
lxc image list images:
shows the list of available remote images for various distributions that we can use to download and launch as containers. This specific list shows all sort of distributions like Alpine, Debian, Gentoo, Opensuse and Fedora.
Let’s launch a container with Ubuntu 16.04 and call it c1:
$ lxc launch ubuntu:x c1
Creating c1
Starting c1
$ _
We used the launch action, then selected the image ubuntu:x (x is an alias for the Xenial/16.04 image) and lastly we use the name c1 for our container.
Let’s view our first installed container,
$ lxc list

+---------+---------+----------------------+------+------------+-----------+
| NAME | STATE   | IPV4                 | IPV6 | TYPE       | SNAPSHOTS    |
+---------+---------+----------------------+------+------------+-----------+
| c1   | RUNNING | 10.173.82.158 (eth0) |      | PERSISTENT | 0            |
+---------+---------+----------------------+------+------------+-----------+
Our first container c1 is running and it has an IP address (accessible locally). It is ready to be used!
Install a Web server
We can run commands in our container. The action for running commands, is exec.
$ lxc exec c1 -- uptime
 11:47:25 up 2 min, 0 users, load average: 0.07, 0.05, 0.04
$ _
After the action exec, we specify the container and finally we type command to run inside the container. The uptime is just 2 minutes, it’s a fresh container :-).
The — thing on the command line has to do with parameter processing of our shell. If our command does not have any parameters, we can safely omit the –.
$ lxc exec c1 -- df -h
This is an example that requires the –, because for our command we use the parameter -h. If you omit the –, you get an error.
Let’s get a shell in the container, and update the package list already.
$ lxc exec c1 bash
root@c1:~# apt update
Ign http://archive.ubuntu.com trusty InRelease
Get:1 http://archive.ubuntu.com trusty-updates InRelease [65.9 kB]
Get:2 http://security.ubuntu.com trusty-security InRelease [65.9 kB]
...
Hit http://archive.ubuntu.com trusty/universe Translation-en
Fetched 11.2 MB in 9s (1228 kB/s)
Reading package lists... Done
root@c1:~# apt upgrade
Reading package lists... Done
Building dependency tree
...
Processing triggers for man-db (2.6.7.1-1ubuntu1) ...
Setting up dpkg (1.17.5ubuntu5.7) ...
root@c1:~# _
We are going to install nginx as our Web server. nginx is somewhat cooler than Apache Web server.
root@c1:~# apt install nginx
Reading package lists... Done
Building dependency tree
...
Setting up nginx-core (1.4.6-1ubuntu3.5) ...
Setting up nginx (1.4.6-1ubuntu3.5) ...
Processing triggers for libc-bin (2.19-0ubuntu6.9) ...
root@c1:~# _
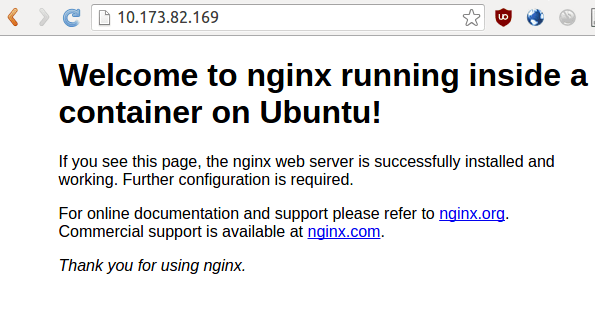
Let’s view our Web server with our browser. Remeber the IP address you got 10.173.82.158, so I enter it into my browser.

Let’s make a small change in the text of that page. Back inside our container, we enter the directory with the default HTML page.
root@c1:~# cd /var/www/html/
root@c1:/var/www/html# ls -l
total 2
-rw-r--r-- 1 root root 612 Jun 25 12:15 index.nginx-debian.html
root@c1:/var/www/html#
We can edit the file with nano, then save

Finally, let’s check the page again,
Clearing up
Let’s clear up the container by deleting it. We can easily create new ones when we need them.
$ lxc list
+---------+---------+----------------------+------+------------+-----------+
| NAME | STATE   | IPV4                 | IPV6 | TYPE       | SNAPSHOTS    |
+---------+---------+----------------------+------+------------+-----------+
| c1   | RUNNING | 10.173.82.169 (eth0) |      | PERSISTENT | 0            |
+---------+---------+----------------------+------+------------+-----------+
$ lxc stop c1
$ lxc delete c1
$ lxc list
+---------+---------+----------------------+------+------------+-----------+
| NAME | STATE   | IPV4                 | IPV6 | TYPE       | SNAPSHOTS    |
+---------+---------+----------------------+------+------------+-----------+
+---------+---------+----------------------+------+------------+-----------+
We stopped (shutdown) the container, then we deleted it.
That’s all. There are many more ideas on what do with containers. Here are the first steps on setting up our Ubuntu desktop and trying out one such container.
12 pings
Skip to comment form
[…] can have LXD containers on your home computer, you can also have them on your Virtual-Private Server (VPS). If you have any further questions on […]
[…] have set up LXD on either our personal computer or on the cloud (like DigitalOcean and Scaleway). Actually, we can even try LXD online for free at […]
[…] previous posts, we saw how to configure LXD/LXC containers on a VPS on DigitalOcean and Scaleway. There are many more VPS […]
[…] Trying out LXD containers on our Ubuntu and set up LXD on your system. Then, come back here and try the following […]
[…] Trying out LXD containers on our Ubuntu in order to make the initial (one-time) configuration of LXD on your Ubuntu […]
[…] you first configure LXD, you need to make important decisions. Decisions that relate to where you are storing the […]
[…] Let’s create the new container for LXD. If this is the first time you use LXD, have a look at Trying out LXD containers on our Ubuntu. […]
[…] game. For best results, select ZFS as the storage backend, and place the space on an SSD disk. Also Trying out LXD containers on our Ubuntu may […]
[…] see how to setup LXD on your Ubuntu desktop. There are extra resources if you want to install LXD on other […]
[…] https://blog.simos.info/trying-out-lxd-containers-on-our-ubuntu/ on how to set up and test LXD on Ubuntu (or another Linux […]
[…] are going to compile and install retdec in an LXD container. In this way, it will not mess up our Linux installation with additional packages and installed […]
[…] via: https://blog.simos.info/trying-out-lxd-containers-on-our-ubuntu/ […]