
Civo is a new UK company that offers virtual private servers (VPS). They are currently in beta, and I am testing here their management interface and the process of setting up LXD on Civo VPS.
What differentiates greatly one VPS provider from another, is the Web management interface. And the CLI interface.
Management interface
Once you log in, you are presented with the dashboard,

The Dashboard shows a summary of the servers that you are running if any. The first thing we notice, is that Civo uses the term instance for the running VPSes. Other providers would use terms like droplets and linodes.
Here is what each option offers,
- Instances, any VPS that is running is here. You use this to create a new instance.
- Networks, specify additional internal networks The address range is 10.x.x.x, and there is a default one already. When you launch a new instance, you can select on which network to assign it to.
- Firewalls, there is no default firewall, and you can create rules that blocks TCP, UDP and ICMP.
- Snapshots, create snapshots of instances.
- SSH Keys, add your SSH key pair. Good to do so before launching an instance so that you can avoid using a password.
- DNS, assign
ns0.civo.comandns1.civo.comas the nameservers of your domain and you can manage them on Civo. - Load balancers, add a load balancer for either HTTP or HTTPS.
In the next section, Other, here are the details.
- Invoices, invoices that are issued at the end of the month.
- Settings, which tabs about Profile, Security, Webhooks and Billing. Here is the tab for Webhooks. Webhooks allow to read all sort of events that can happen on Civo (like Instance Created, Instance Started).

- Quota, showing the default limits as to how many instances you can start, and so on. The default limit for instances is 16 of them, for disk space it is 400GB, for RAM is 16GB. You can contact to have them increased if you need so.
- Suggestions, the ability to add suggestions. Very simple to use, and there are already many suggestions.
- Changelog, is the changelog of the development of the Web management interface. Here are the most recent entries. For many entries, people vote for them and they get implemented. Also, note the community contributed FreeBSD image.

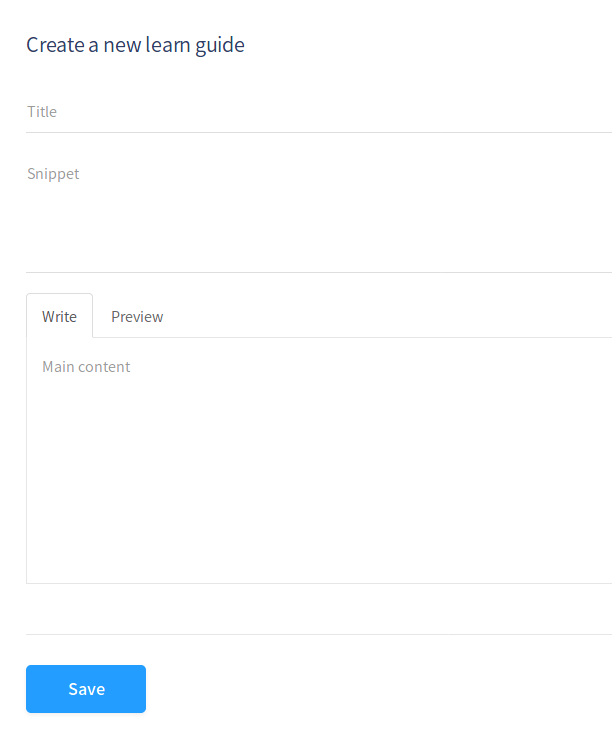
- Content/Learn, as a simple interface to add technical guides. Here is how it looks.

It may not be clear how to write a learn guide. The answer is at the current list of Civo learn guides. You use markup for the learn guides.


Creating an instance
Let’s create an instance. Here is the Instances tab. We click on Create instance.

Here is the Create Instance. We set the hostname and how many instances to create. If you select more than one, then they would be called myLXD1, myLXD2 and so on. The entry level instance type is called Extra Small, and comes with 1 vCPU core, 1GB RAM, 25GB SSD storage and 1TB transfer allowance. The next option, Small, has double the specs at double the price. The same goes with the next instance type. No surprises at all.

Then, it’s the choice of the operating system. There are four main options, Ubuntu, Centos, Debian and CoreOS, while there is also the option for the user-contributed FreeBSD image. We select Ubuntu 16.04.

Then, we can select the initial user for the image. The default is root, though we can select a non-root user like ubuntu or civo. It makes sense here to select the non-root user ubuntu, so that you do not need to create it later. Most probably, these are created with cloud-init.
With the Network, we can place different instances in the same private subnet so that they communicate with each other. There is an option not to assign a public IPv4 address, which would be handy, if for example you wanted to set up a database in an instance. The database would then be only accessible from other VPSes.
Additionally, you can select a Firewall that was set up earlier.
Furthermore, there is the SSH Key part. Here, the default is to set a random password. You can to explicitly select your SSH Key.
Finally, you can set tags to your instance. That makes sense when you want to describe was a certain VPS is doing.
Lastly, you click on Create to make the instance.

Once you click to create an instance, it goes online in a several seconds.
Here is how it looks while it is being built.

And here is when the instance is running,

How do you connect with SSH? On the right of the screen, you can find the IP address and username.

We see here the private IP address, plus the public IPv4 address. Also, the username to connect to.
Above the SSH information, there are the action buttons,
- Notes, taking notes in markdown.
- Snapshot, taking a snapshot of the instance.
- Restore, restoring from a snapsnot.
- Reboot, rebooting the server.
- Shutdown, performing a shutdown of the server.
- Console, getting a console screen.
- Delete, deleting the instance.
Logging in
Let’s log in to the instance. The command looks like ssh ubuntu@185.136.232.201.

Nice. It shows no packages to update because the system did not have the chance yet to run sudo apt upgrade. It’s running the stock Ubuntu 16.04 kernel. Time to
$ sudo apt update
Here is the output. For some reason, the repository is http://nova.clouds.archive.ubuntu.com/ instead of the typical http://archive.ubuntu.com/. This was configured by cloud-init and you can find the generated configuration at /etc/apt/sources.list.

Let’s log out and log in again.
Welcome to Ubuntu 16.04.1 LTS (GNU/Linux 4.4.0-53-generic x86_64)

* Documentation: https://help.ubuntu.com
 * Management: https://landscape.canonical.com
 * Support: https://ubuntu.com/advantage

Get cloud support with Ubuntu Advantage Cloud Guest:
 http://www.ubuntu.com/business/services/cloud

191 packages can be updated.
99 updates are security updates.
Now it knows that there are many updates and several security updates.
The unattended-upgrades package is installed, which may automatically upgrade the packages. What does the configuration say?
$ cat /etc/apt/apt.conf.d/50unattended-upgrades
// Automatically upgrade packages from these (origin:archive) pairs
Unattended-Upgrade::Allowed-Origins {
 "${distro_id}:${distro_codename}";
 "${distro_id}:${distro_codename}-security";
// "${distro_id}:${distro_codename}-updates";
// "${distro_id}:${distro_codename}-proposed";
// "${distro_id}:${distro_codename}-backports";
};

// List of packages to not update (regexp are supported)
Unattended-Upgrade::Package-Blacklist {
// "vim";
// "libc6";
// "libc6-dev";
// "libc6-i686";
};
...
Are any updates going to happen automatically?
$ cat /etc/apt/apt.conf.d/20auto-upgrades
APT::Periodic::Update-Package-Lists "1";
APT::Periodic::Unattended-Upgrade "1";
The package list will be updated (sudo apt update), and also both system and security updates will be installed.
To figure out what will happen when an unattended upgrade takes place, run
$ sudo unattended-upgrade --dry-run -d
This will perform a simulation of the unattended upgrade. There will be lots of text printed on the screen. If you miss it, you can find a copy in /var/log/unattended-upgrades/
Note: ten hours have passed since the set up of this instance. The unattended-upgrade has not been triggered yet. It should get triggered sometime within 24 hours. If only there was a way to figure out when exactly systemd will trigger the automated unattended upgrades.
Let’s check what this file says,
$ cat systemd/system/timers.target.wants/apt-daily.timer
[Unit]
Description=Daily apt activities

[Timer]
OnCalendar=*-*-* 6,18:00
RandomizedDelaySec=12h
AccuracySec=1h
Persistent=true

[Install]
WantedBy=timers.target
Therefore, the automated unattended update should happen at 18:00, with a randomized delay of 12 hours and accuracy ±1 hour. This means that it will happen between 18:00 and 06:00 (next day) and has a leeway of ±1 hour so as to do alongside any other timers that may be triggered at that timeframe. In this installation, there is only one other timer, that for snapd but no snaps have been installed yet. Since this instance was created after 18:00, it will take some more time for the updates to kick in and no ±1 hour will be needed.
Note: we veered off a bit and got the chance to talk about unattended-upgrades. This stuff is standard Ubuntu useful information and will get their dedicated new post here soon.
With that in mind, let’s just upgrade now and get over with this.
ubuntu@myLXD:~$ sudo apt upgrade
...
Looking into Civo
Here is the /proc/cpuinfo,
ubuntu@myLXD:~$ cat /proc/cpuinfo
processor : 0
vendor_id : GenuineIntel
cpu family : 6
model : 60
model name : Intel Core Processor (Haswell, no TSX)
stepping : 1
microcode : 0x1
cpu MHz : 2297.338
cache size : 4096 KB
physical id : 0
siblings : 1
core id : 0
cpu cores : 1
apicid : 0
initial apicid : 0
fpu : yes
fpu_exception : yes
cpuid level : 13
wp : yes
flags : fpu vme de pse tsc msr pae mce cx8 apic sep mtrr pge mca cmov pat pse36 clflush mmx fxsr sse sse2 syscall nx rdtscp lm constant_tsc rep_good nopl cpuid pni pclmulqdq ssse3 fma cx16 pcid sse4_1 sse4_2 x2apic movbe popcnt tsc_deadline_timer aes xsave avx f16c rdrand hypervisor lahf_lm abm invpcid_single pti fsgsbase bmi1 avx2 smep bmi2 erms invpcid xsaveopt arat
bugs : cpu_meltdown spectre_v1 spectre_v2
bogomips : 4594.67
clflush size : 64
cache_alignment : 64
address sizes : 40 bits physical, 48 bits virtual
power management:

ubuntu@myLXD:~$
How do the network interfaces look like?
ubuntu@myLXD:~$ ifconfig
ens3 Link encap:Ethernet HWaddr fa:16:3e:1e:98:39
 inet addr:10.27.1.3 Bcast:10.27.1.255 Mask:255.255.255.0
 UP BROADCAST RUNNING MULTICAST MTU:1450 Metric:1
 RX packets:35532 errors:0 dropped:0 overruns:0 frame:0
 TX packets:29736 errors:0 dropped:0 overruns:0 carrier:0
 collisions:0 txqueuelen:1000
 RX bytes:169307631 (169.3 MB) TX bytes:3334703 (3.3 MB)

lo Link encap:Local Loopback
 inet addr:127.0.0.1 Mask:255.0.0.0
 UP LOOPBACK RUNNING MTU:65536 Metric:1
 RX packets:376 errors:0 dropped:0 overruns:0 frame:0
 TX packets:376 errors:0 dropped:0 overruns:0 carrier:0
 collisions:0 txqueuelen:1000
 RX bytes:46248 (46.2 KB) TX bytes:46248 (46.2 KB)
The VM gets a private IP address.
How about the storage?
ubuntu@myLXD:~$ sudo fdisk -l
Disk /dev/vda: 25 GiB, 26843545600 bytes, 52428800 sectors
Units: sectors of 1 * 512 = 512 bytes
Sector size (logical/physical): 512 bytes / 512 bytes
I/O size (minimum/optimal): 512 bytes / 512 bytes
Disklabel type: dos
Disk identifier: 0xbef4c92a

Device    Boot Start End      Sectors  Size Id Type
/dev/vda1 *    2048  52428766 52426719 25G  83 Linux
The Ubuntu installation uses about 2GB of disk space.
Here is the WHOIS entry of the real IP address I got for the instance.
% This is the RIPE Database query service.
% The objects are in RPSL format.
%
% The RIPE Database is subject to Terms and Conditions.
% See http://www.ripe.net/db/support/db-terms-conditions.pdf

% Note: this output has been filtered.
% To receive output for a database update, use the "-B" flag.

% Information related to '185.136.232.0 - 185.136.232.255'

% Abuse contact for '185.136.232.0 - 185.136.232.255' is 'abuse@absolutedevops.io'

inetnum: 185.136.232.0 - 185.136.232.255
netname: ADO-CIVO-CORE
country: GB
admin-c: ANNE3-RIPE
tech-c: ANNE3-RIPE
status: ASSIGNED PA
mnt-by: MNT-ADVANTAGE-INTERACTIVE
mnt-by: AI
mnt-by: uk-absolutedevops-1-mnt
created: 2017-01-06T11:58:04Z
last-modified: 2017-01-06T11:58:04Z
source: RIPE

role: Ai Networks Limited - Network Engineering Team
org: ORG-AIL8-RIPE
address: 22 Long Acre
address: Covent Garden
address: London
address: WC2E 9LY
admin-c: HM11434-RIPE
admin-c: MM43710-RIPE
admin-c: RL11344-RIPE
admin-c: ST10458-RIPE
tech-c: HM11434-RIPE
tech-c: MM43710-RIPE
tech-c: RL11344-RIPE
tech-c: ST10458-RIPE
nic-hdl: ANNE3-RIPE
mnt-by: AI
created: 2016-03-14T20:32:59Z
last-modified: 2017-01-27T10:55:09Z
source: RIPE # Filtered

% Information related to '185.136.232.0/22AS50056'

route: 185.136.232.0/22
descr: Ai Networks route
origin: AS50056
mnt-by: MNT-ADVANTAGE-INTERACTIVE
created: 2016-02-25T17:04:17Z
last-modified: 2016-02-25T17:04:17Z
source: RIPE

% This query was served by the RIPE Database Query Service version 1.90 (HEREFORD)
Installing LXD
Is LXD already installed on the Ubuntu instance?
ubuntu@myLXD:~$ apt policy lxd
lxd:
 Installed: 2.0.11-0ubuntu1~16.04.4
 Candidate: 2.0.11-0ubuntu1~16.04.4
 Version table:
 2.21-0ubuntu2~16.04.1 100
 100 http://nova.clouds.archive.ubuntu.com/ubuntu xenial-backports/main amd64 Packages
 *** 2.0.11-0ubuntu1~16.04.4 500
 500 http://nova.clouds.archive.ubuntu.com/ubuntu xenial-updates/main amd64 Packages
 100 /var/lib/dpkg/status
 2.0.2-0ubuntu1~16.04.1 500
 500 http://security.ubuntu.com/ubuntu xenial-security/main amd64 Packages
 2.0.0-0ubuntu4 500
 500 http://nova.clouds.archive.ubuntu.com/ubuntu xenial/main amd64 Packages
ubuntu@myLXD:~$
It is, as we are running a standard Ubuntu image.
Install zfsutils-linux to get ZFS support for LXD.
ubuntu@myLXD:~$ sudo apt install -y zfsutils-linux
...
How much free space is there?
ubuntu@myLXD:~$ df -h /
Filesystem Size Used Avail Use% Mounted on
/dev/vda1 25G 2,0G 23G 9% /
ubuntu@myLXD:~$
Okay, so we can easily allocate 15GB for LXD.
Time to init LXD.
ubuntu@myLXD:~$ sudo lxd init
Do you want to configure a new storage pool (yes/no) [default=yes]?
Name of the storage backend to use (dir or zfs) [default=zfs]:
Create a new ZFS pool (yes/no) [default=yes]?
Name of the new ZFS pool or dataset [default=lxd]:
Would you like to use an existing block device (yes/no) [default=no]?
Size in GB of the new loop device (1GB minimum) [default=15]:
Would you like LXD to be available over the network (yes/no) [default=no]?
Do you want to configure the LXD bridge (yes/no) [default=yes]?
Warning: Stopping lxd.service, but it can still be activated by:
 lxd.socket

LXD has been successfully configured.
ubuntu@myLXD:~$
We pressed Enter all the way to accept the defaults. All defaults were fine, and used the ZFS storage backend with 15GB of preallocated space. Not on a block device, but on a loopback file.
Setting up LXD
Let’s use the lxc command.
ubuntu@myLXD:~$ lxc list
Generating a client certificate. This may take a minute...
If this is your first time using LXD, you should also run: sudo lxd init
To start your first container, try: lxc launch ubuntu:16.04

Permission denied, are you in the lxd group?
ubuntu@myLXD:~$
Although the Ubuntu image got a preconfigured ubuntu non-root account and had LXD pre-installed, it did not add this ubuntu account to the lxd group.
In which groups that ubuntu belong to?
ubuntu@myLXD:~$ groups ubuntu
ubuntu : ubuntu
ubuntu@myLXD:~$
No sudo group? So, how can we sudo to root?
ubuntu@myLXD:~$ sudo cat /etc/sudoers.d/90-cloud-init-users
# Created by cloud-init v. 0.7.8 on Tue, 06 Feb 2018 23:13:56 +0000

# User rules for ubuntu
ubuntu ALL=(ALL) NOPASSWD:ALL
ubuntu@myLXD:~$
cloud-init adds this file when creating the instance, and gives the permission to the ubuntu username to sudo to root. The alternative would be for cloud-init to just add the ubuntu username to the sudo group.
Let’s add ubuntu to the lxd group.
ubuntu@myLXD:~$ groups lxd
lxd : nogroup
ubuntu@myLXD:~$ sudo usermod --append --groups lxd ubuntu
ubuntu@myLXD:~$
Now, either log out and log in again, or just run newgrp lxd (creates a new shell with membership to the lxd group). And you can now run successfully
ubuntu@myLXD:~$ lxc list
+------+-------+------+------+------+-----------+
| NAME | STATE | IPV4 | IPV6 | TYPE | SNAPSHOTS |
+------+-------+------+------+------+-----------+
ubuntu@myLXD:~$
Testing LXD
We can perform now our typical test of LXD. Create a container, install a web server in there, expose the container to the Internet with an iptables rule, and access the web server from our local computer.
Launch a LXD container, install nginx, make an appropriate change in the default index.file.
ubuntu@myLXD:~$ lxc launch ubuntu:16.04 mycontainer
Creating mycontainer
Retrieving image: rootfs: 100% (24.44MB/s)
Starting mycontainer
ubuntu@myLXD:~$
ubuntu@myLXD:~$ lxc exec mycontainer -- apt update
Get:1 http://security.ubuntu.com/ubuntu xenial-security InRelease [102 kB]
Hit:2 http://archive.ubuntu.com/ubuntu xenial InRelease
Get:3 http://archive.ubuntu.com/ubuntu xenial-updates InRelease [102 kB]
Get:4 http://archive.ubuntu.com/ubuntu xenial-backports InRelease [102 kB]
...ubuntu@myLXD:~$ lxc exec mycontainer -- apt install -y nginx
...ubuntu@myLXD:~$ lxc exec mycontainer -- sed -i 's/nginx\!/nginx running in a LXD container on Civo\!/g' /var/www/html/index.nginx-debian.html
ubuntu@myLXD:~$
But does it work?
ubuntu@myLXD:~$ curl http://10.63.50.130
<!DOCTYPE html>
<html>
<head>
<title>Welcome to nginx running in a LXD container on Civo!</title>
<style>
 body {
 width: 35em;
 margin: 0 auto;
 font-family: Tahoma, Verdana, Arial, sans-serif;
 }
</style>
</head>
<body>
<h1>Welcome to nginx running in a LXD container on Civo!</h1>
<p>If you see this page, the nginx web server is successfully installed and
working. Further configuration is required.</p>

<p>For online documentation and support please refer to
<a href="http://nginx.org/">nginx.org</a>.<br/>
Commercial support is available at
<a href="http://nginx.com/">nginx.com</a>.</p>

<p><em>Thank you for using nginx.</em></p>
</body>
</html>
ubuntu@myLXD:~$
Yes, it works when accessed locally from within the server. Now it’s time to add the iptables rule to make the container accessible from the Internet.
The IP address of the network interface of the instance is 185.136.4.5.
The IP address of the LXD container is 10.27.1.3.
The network interface of the server is ens3.
Therefore,
PORT=80 SERVER_IP=185.136.4.5 CONTAINER_IP=10.27.1.3 INTERFACE=ens3 sudo -E bash -c 'iptables -t nat -I PREROUTING -i $INTERFACE -p TCP -d $SERVER_IP --dport $PORT -j DNAT --to-destination $CONTAINER_IP:$PORT -m comment --comment "forward to the Nginx container"'
We visit the IP address with our browser, and here it is,

You can use the package iptables-persistent in order to save the iptables rule.
That’s it! I hope you enjoyed the post.
Issues
Are there any default passwords?
Both the root account and ubuntu account have some sort of default password. However, those passwords are not given during the installation and cannot be found anywhere in the management screen. In addition, the SSH server supports password authentication, and all this is not nice.
My understanding is that if I did not select an SSH key-pair during the creation of the instance, I would be given that password. But since I selected to use an SSH key-pair instead, a random password was set but not given to me.
Let’s contact Civo support about this. edit. In less than five minutes, I go the reply. If you select an SSH key-pair when creating an instance, then a password is still getting generated but is not exposed to the management interface. You can use the civo command-line tool though to find that password. See next issues to get civo installed and configured. Then, run the following. The password is at the seventh column.
$ civo instance
+----------+-------+-----------+--------------+--------------------------+--------+--------+------------------+----------+------+
| ID       | Name  | Size      | Template     | IP Addresses             | Status | User   | Password         | Firewall | Tags |
+----------+-------+-----------+--------------+--------------------------+--------+--------+------------------+----------+------+
| 887604d3 | myLXD | g1.xsmall | ubuntu-16.04 | 10.27.1.3 => 185.136.4.5 | ACTIVE | ubuntu | FMEKQM39anqbnr   | default  |      |
+----------+-------+-----------+--------------+--------------------------+--------+--------+------------------+----------+------+
How do I compile the civo command-line management tool?
First, set up Go according to https://blog.simos.info/installing-the-go-programming-language-in-ubuntu/
Then,
$ go get github.com/absolutedevops/civo
# github.com/jeffail/gabs
/tmp/go/src/github.com/jeffail/gabs/gabs.go:486: e.SetEscapeHTML undefined (type *json.Encoder has no field or method SetEscapeHTML)
/tmp/go/src/github.com/jeffail/gabs/gabs.go:493: e.SetIndent undefined (type *json.Encoder has no field or method SetIndent)
/tmp/go/src/github.com/jeffail/gabs/gabs.go:504: encoder.SetEscapeHTML undefined (type *json.Encoder has no field or method SetEscapeHTML)
Exit 2
If you get this error, get a newer version of Go, 1.7 or newer.
$ go version
go version go1.9.3 linux/amd64

$ go get github.com/absolutedevops/civo
# github.com/absolutedevops/civo/cmd
absolutedevops/civo/cmd/root.go:26:13: undefined: toml.TomlTree
Exit 2
If you get this error, edit the source at absolutedevops/civo/cmd/root.go and rename toml.TomlTree to toml.Tree. The package author removed the extra Toml in the name since it was superfluous.
Then, you compile locally with
$ go build github.com/absolutedevops/civo
$
The executable is located in the current directory.
Let’s move it to /usr/local/bin
$ sudo mv civo /usr/local/bin/$
That’s it. You can invoke civo and use according to the instructions at https://www.civo.com/learn/civo-administration-at-the-command-line
How do I download a pre-compiled civo command-line management tool?
Follow the instructions at https://www.civo.com/learn/civo-administration-at-the-command-line
How to use the civo command-line management tool?
First, visit the page https://www.civo.com/api and locate your API key. It is located where it says,
Because you have an account on Civo, you already have an API key - t90FgEpo3hNGV6ZrU7tHXeeLB1bsbx5If8wO5jqrv2aai.
Then, run
$ civo apikey save --key t90FgEpo3hNGV6ZrU7tHXeeLB1bsbx5If8wO5jqrv2aai --name mycivo $
Finally, follow the instructions at https://www.civo.com/learn/civo-administration-at-the-command-line
2 comments
Good howto. I’m liking Scaleway from France at the moment and yes I’ve installed LXD on one of their VPS’s! According to the whois data, it seems to be LCN behind Civo who are an established company
Author
Thanks. I added to the post the WHOIS entry of the public IP address I got.
For Scaleway, did you follow the compilation instructions or have you tried KEXEC to boot the stock Ubuntu kernel? The second way is in my pending list of future posts.